Impact Window Installation Process Florida: What to Expect Start to Finish (2026)
Most homeowners are surprised by how smooth impact window installation is — and how long the pre-installation phase takes. Understanding the full process before you sign a contract will help you plan your timeline, know what to prepare, and avoid the frustration of unexpected delays. Here's the complete guide.
Updated: October 2026 | Applies to: Broward, Miami-Dade, and Palm Beach Counties
How to Install Impact Windows in Florida: Step-by-Step Impact Window Installation
A code-compliant impact window installation is the same eight steps whether the home is in Miami-Dade, Broward or Palm Beach County. What changes by county is the wind design and the type of product approval the building department will accept.
- 1
Measure every opening and confirm the wind design
Measure each rough opening at several points (older block openings are rarely square) and get the positive and negative design pressure each opening needs. Pressures come from the site's design wind speed, building height, exposure and where the opening sits on the wall — from the local wind-load chart or an engineer's calculation.
- 2
Match each opening to a current product approval
Every window and exterior door needs a product approval under section 553.842, Florida Statutes. Pick a model whose Florida Product Approval (FL#) or Miami-Dade NOA covers the exact size, glass, frame, mullions and anchoring, at or above the required pressures. In Miami-Dade and Broward (the HVHZ), the product needs a current product approval explicitly approved for HVHZ — either a Miami-Dade Notice of Acceptance (NOA) or a Florida Product Approval listed as "Approved for use in HVHZ: Yes".
- 3
Get the building permit before any work starts
The permit holder submits the application, a window and door schedule keyed to a floor-plan sketch, the approval documents with the applicable options marked, and the wind-load chart or sealed calculations. A recorded Notice of Commencement is required when the job value exceeds $5,000, and it must be on site by the first inspection.
- 4
Order the windows (or reserve in-stock units)
Factory-made units typically take 4–8 weeks; in-stock units that match the approved sizes skip the factory wait. Confirm the labels on delivery match the model and approval numbers on the permit.
- 5
Remove the old windows one opening at a time
Each old unit is removed and the opening checked for rot, cracked block or damaged bucks before the new unit goes in, so the house is never left with several open holes. Debris is hauled per the local rules (some cities require their franchise hauler).
- 6
Set bucks and anchor exactly per the approval drawing
Bucks, shims, mull bars and anchors follow the NOA or FL# installation drawing: anchor type, diameter, edge distance, spacing and embedment into block, concrete or wood. Any change to the buck or fasteners needs a signed and sealed letter or drawing from a Florida engineer or architect.
- 7
Seal and waterproof the perimeter
The perimeter is sealed inside and out with the sealants, backer rod and flashing the manufacturer's installation instructions call for, then stucco and trim are patched around the frame.
- 8
Pass the inspections and close the permit
Inspectors check the attachments before they are concealed (some cities accept a buck and mull affidavit from a licensed contractor, architect or engineer at final), then the final inspection closes the permit. Keep the approval documents, permit card and final inspection record — they are what a wind mitigation inspector and a future buyer will ask for.
What the homeowner should verify
- The product approval number (NOA or FL#) on each window's label matches the permit documents — and the approval is current, not expired or archived
- In Miami-Dade or Broward, the approval is explicitly valid for the HVHZ (a Miami-Dade NOA, or an FL# listed as approved for HVHZ use)
- The approved size and design pressure cover each opening — a unit larger than its approval, or rated below the required pressure, is not compliant
- Anchors match the approval drawing: type, size, spacing, edge distance and embedment; any deviation is backed by a signed and sealed engineer's letter
- The Notice of Commencement was recorded before the first inspection (when the job value exceeds $5,000)
- Every required inspection is signed off and the permit shows as finaled in the building department's portal — not just 'installed'
Why the code cares about these steps: in Florida's wind-borne debris region, FBC §1609.1.2 requires glazed openings to be impact-resistant or protected by an impact-resistant covering, with the large-missile test applying within 30 feet of grade. In the High-Velocity Hurricane Zone (Miami-Dade and Broward), FBC §1626 requires envelope components to pass large-missile testing (TAS 201/203) up to 30 feet and small-missile testing above that. An impact window only performs as tested when it is anchored and sealed exactly as its approval shows. See the Florida Building Code for impact windows guide for the code side.
Who does the work: installation, permitting and inspection are coordinated through Vieser Construction, the installation partner for Windows Stock Market projects. Local permit details by city — for example Miramar and Boynton Beach — differ, and the local building department sets the final documentation.
Sources: Florida Building Code, Building, 8th Edition (2023), Sections 1609.1.2 and 1626; section 553.842, Florida Statutes (product evaluation and approval); City of Miramar "Windows & Doors Application Package" (REV 12/2024); City of Boynton Beach Memorandum 18-002 "Retrofit of Windows, Doors". Accessed October 17, 2026.
Impact Window Installation in Real Photos
Photos from real South Florida jobs, in the order the work happens: the new unit arrives, the old window comes out, bucks and mullions are anchored, the perimeter is sealed.
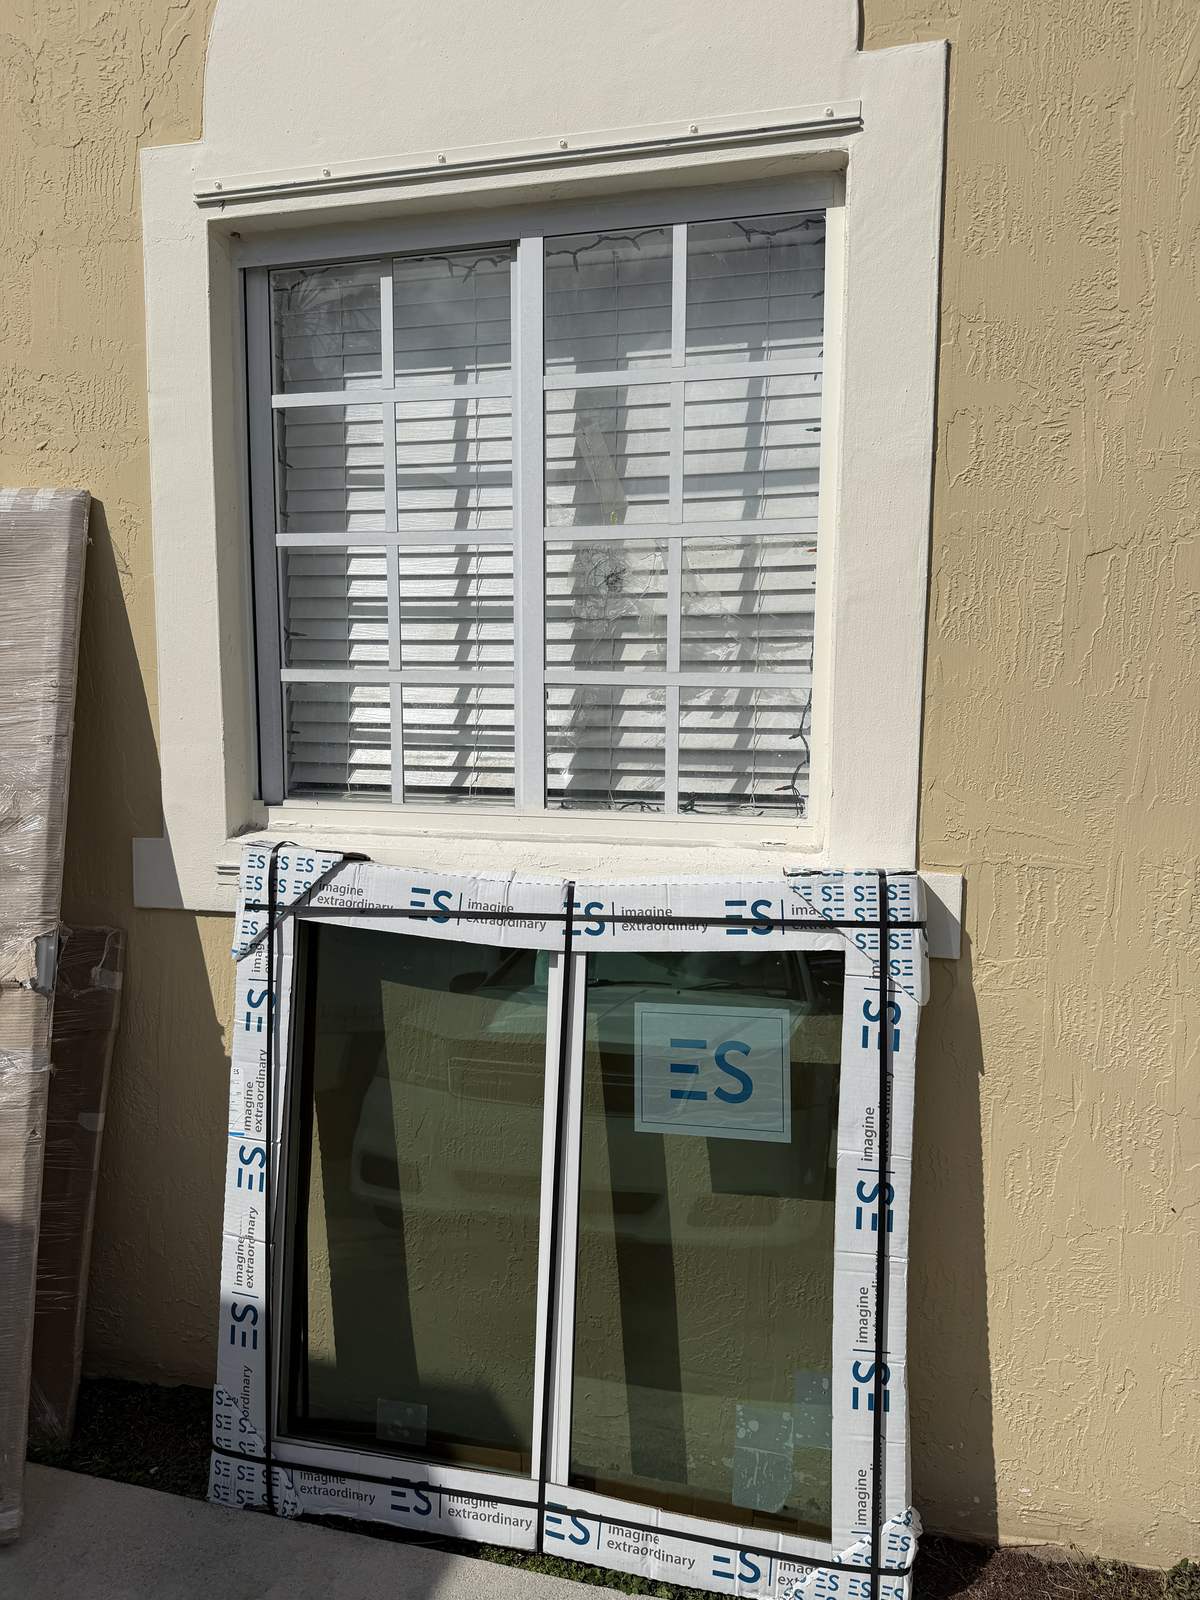
Step 4 · New ES unit in packaging, below the old window it replaces 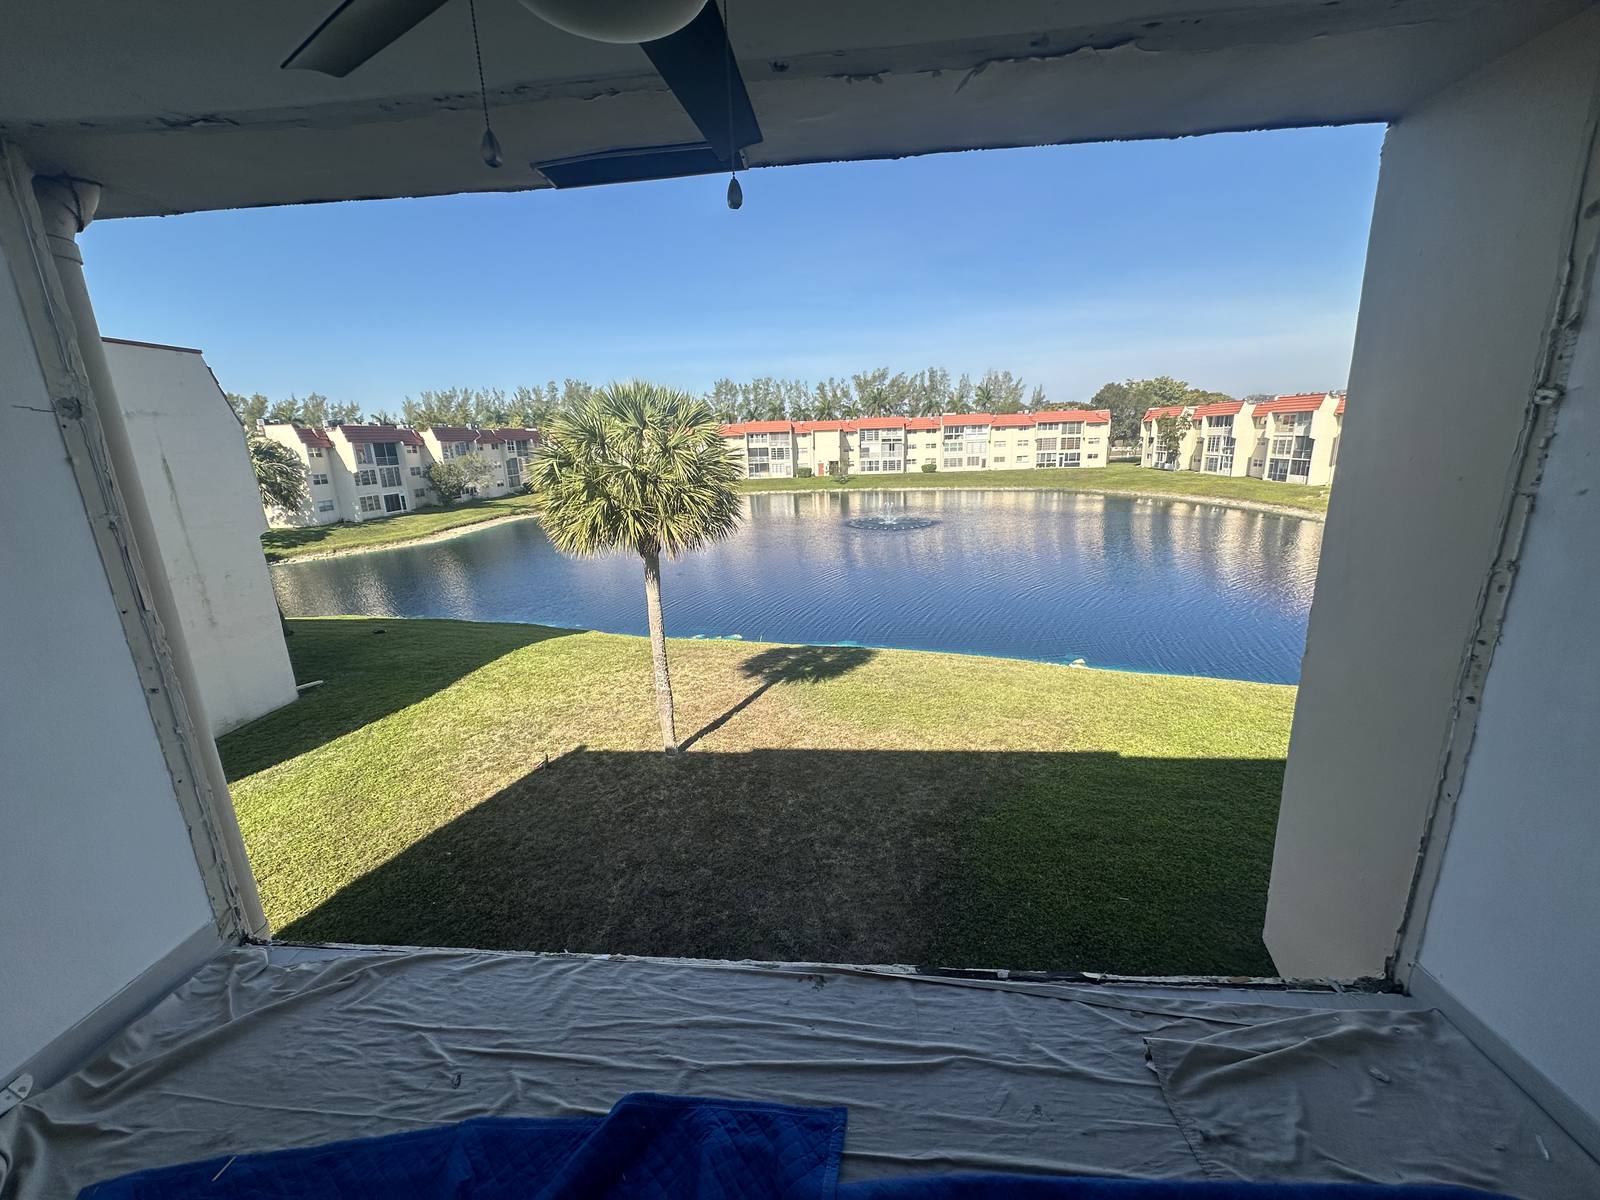
Step 5 · Old window removed, floor protected with a drop cloth 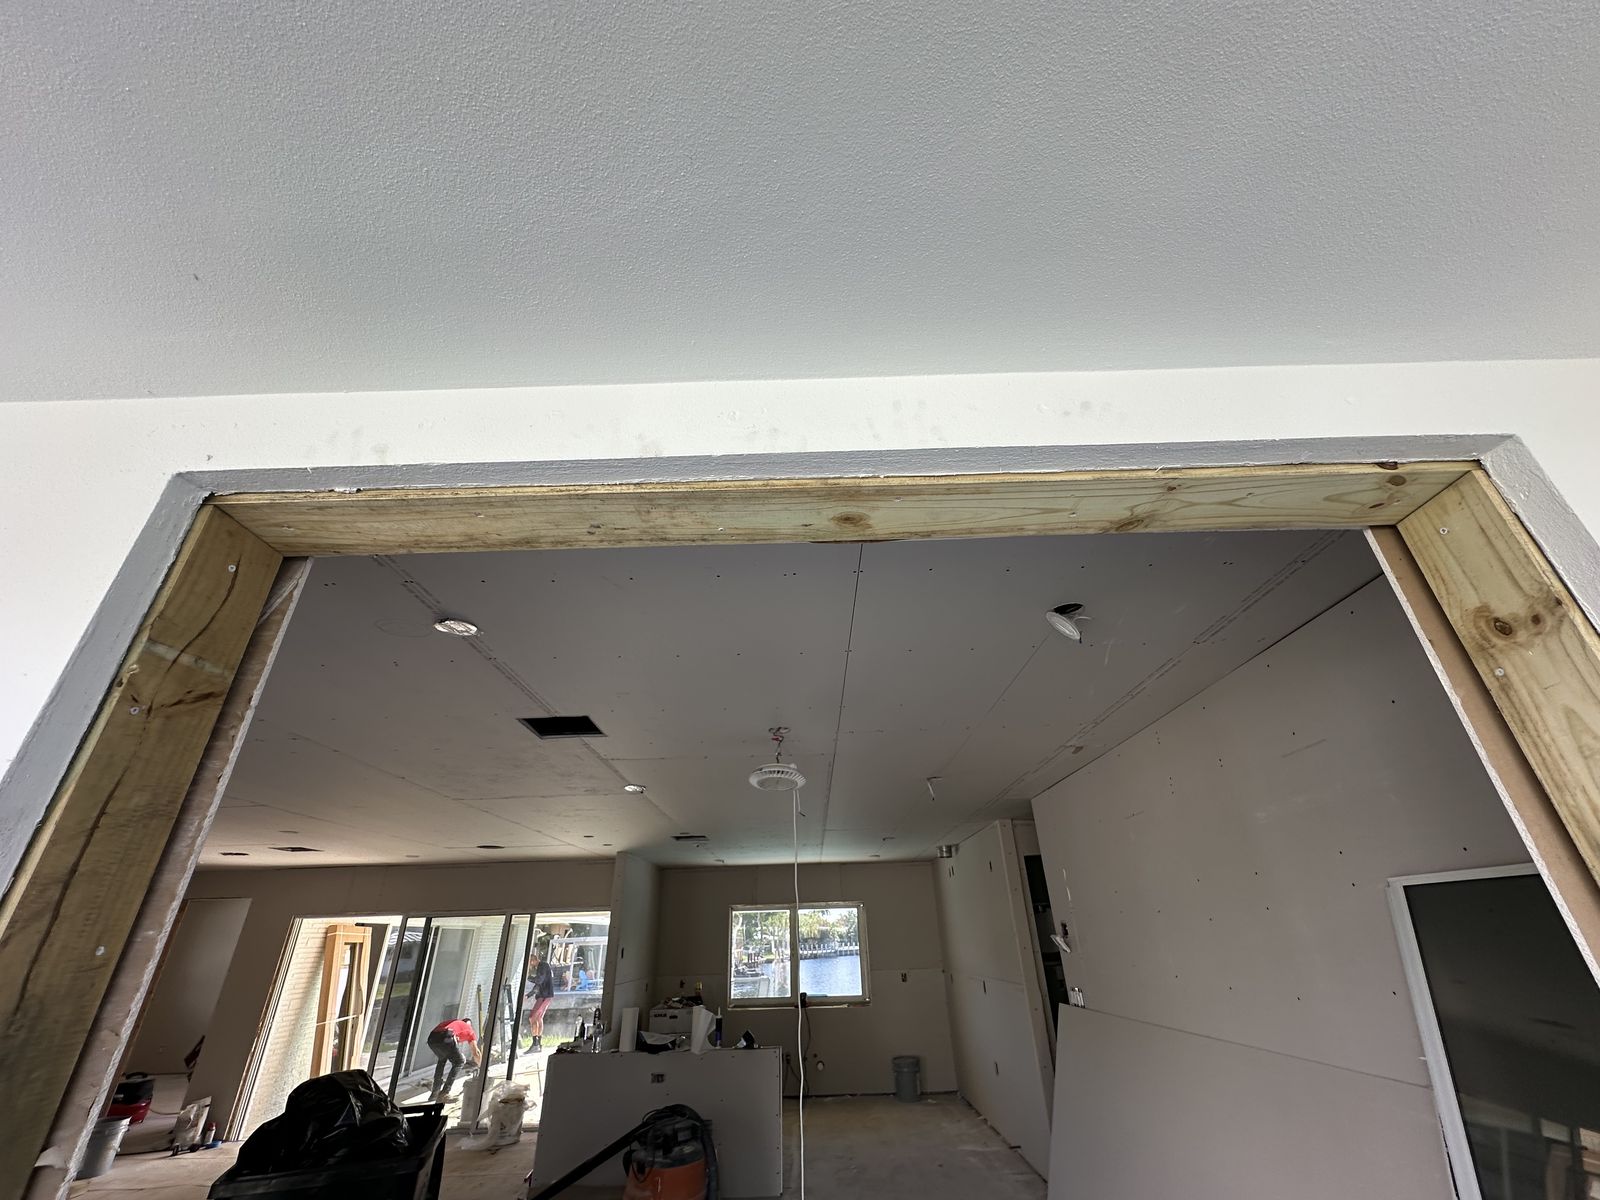
Step 6 · New wood buck framing a wide opening 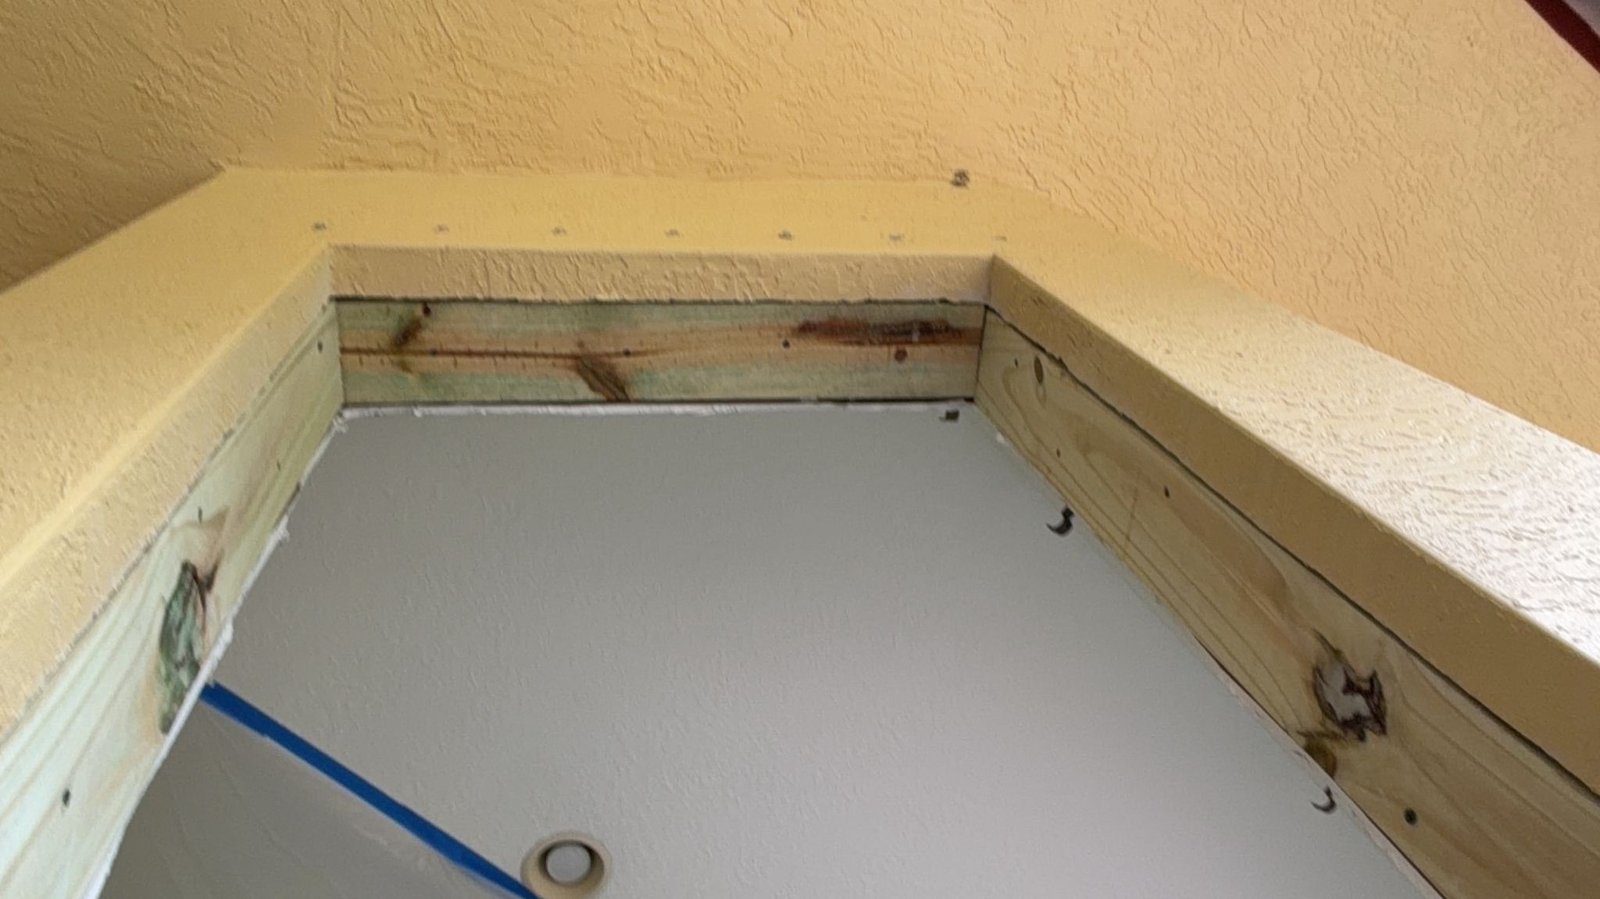
Step 6 · Wood buck anchored around the opening 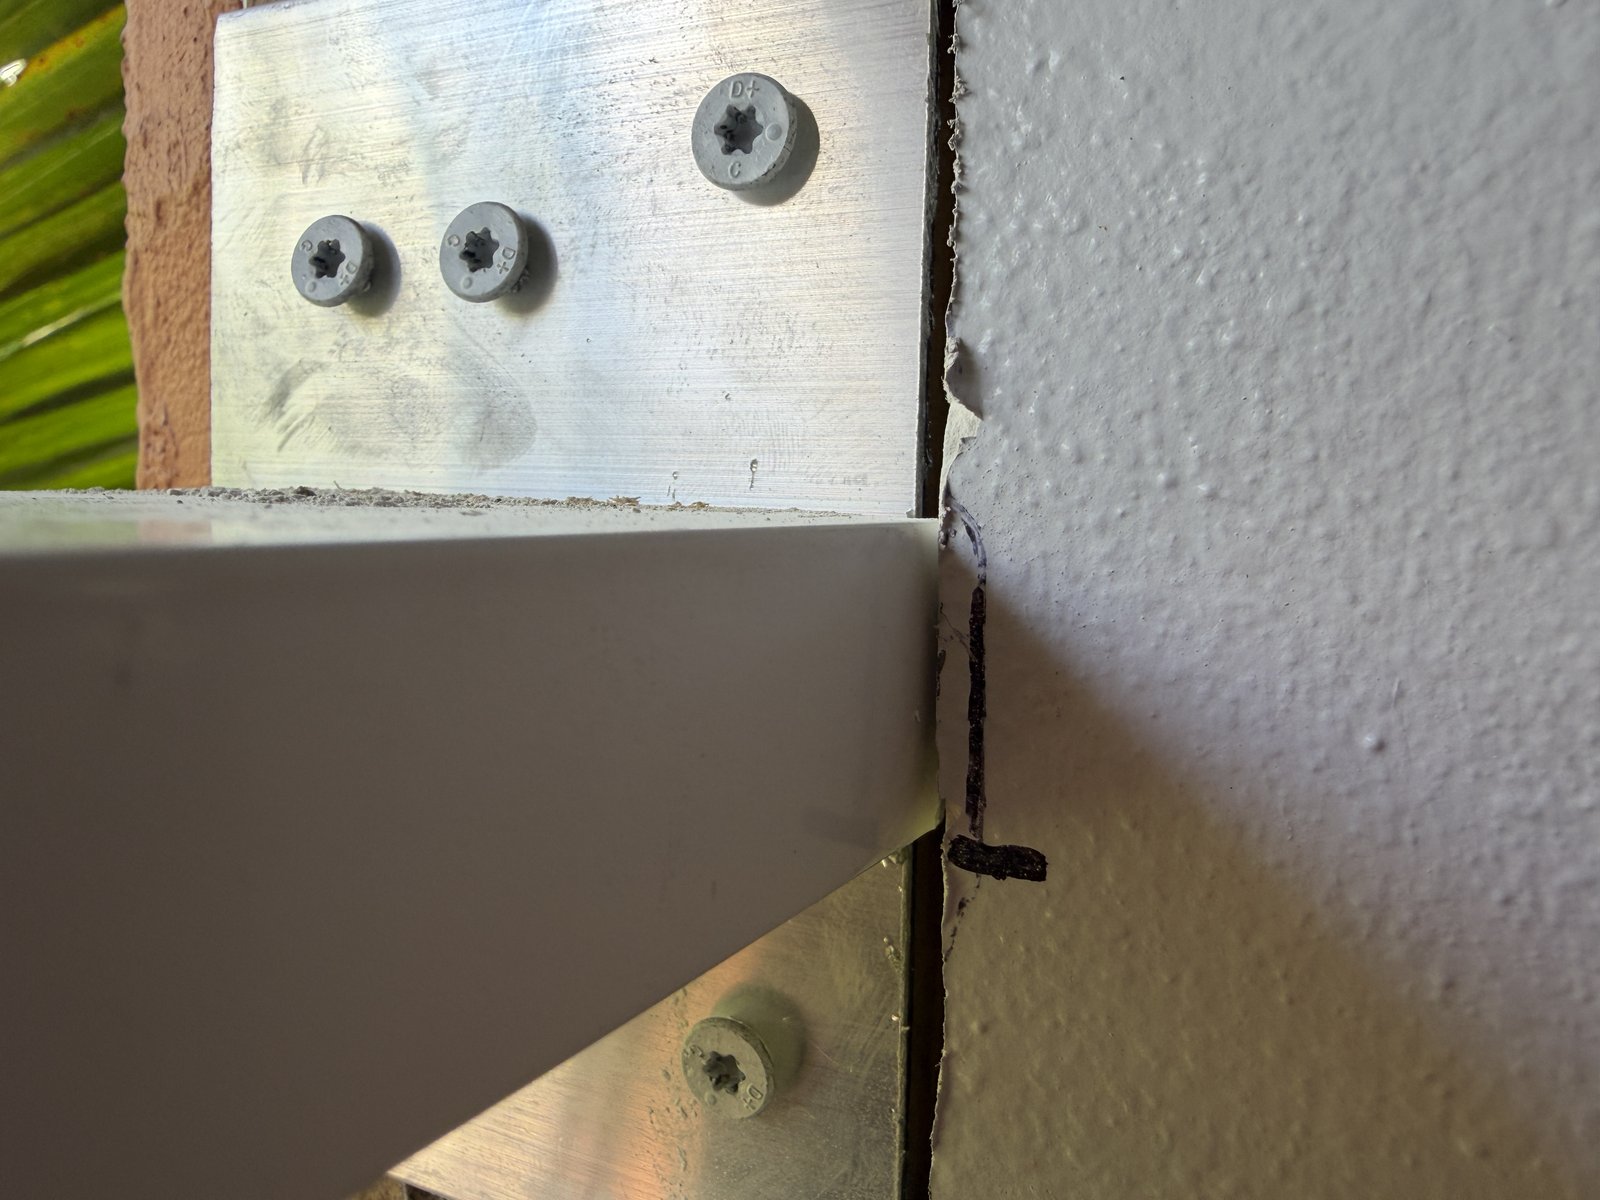
Step 6 · Mullion anchor clip fastened with screws 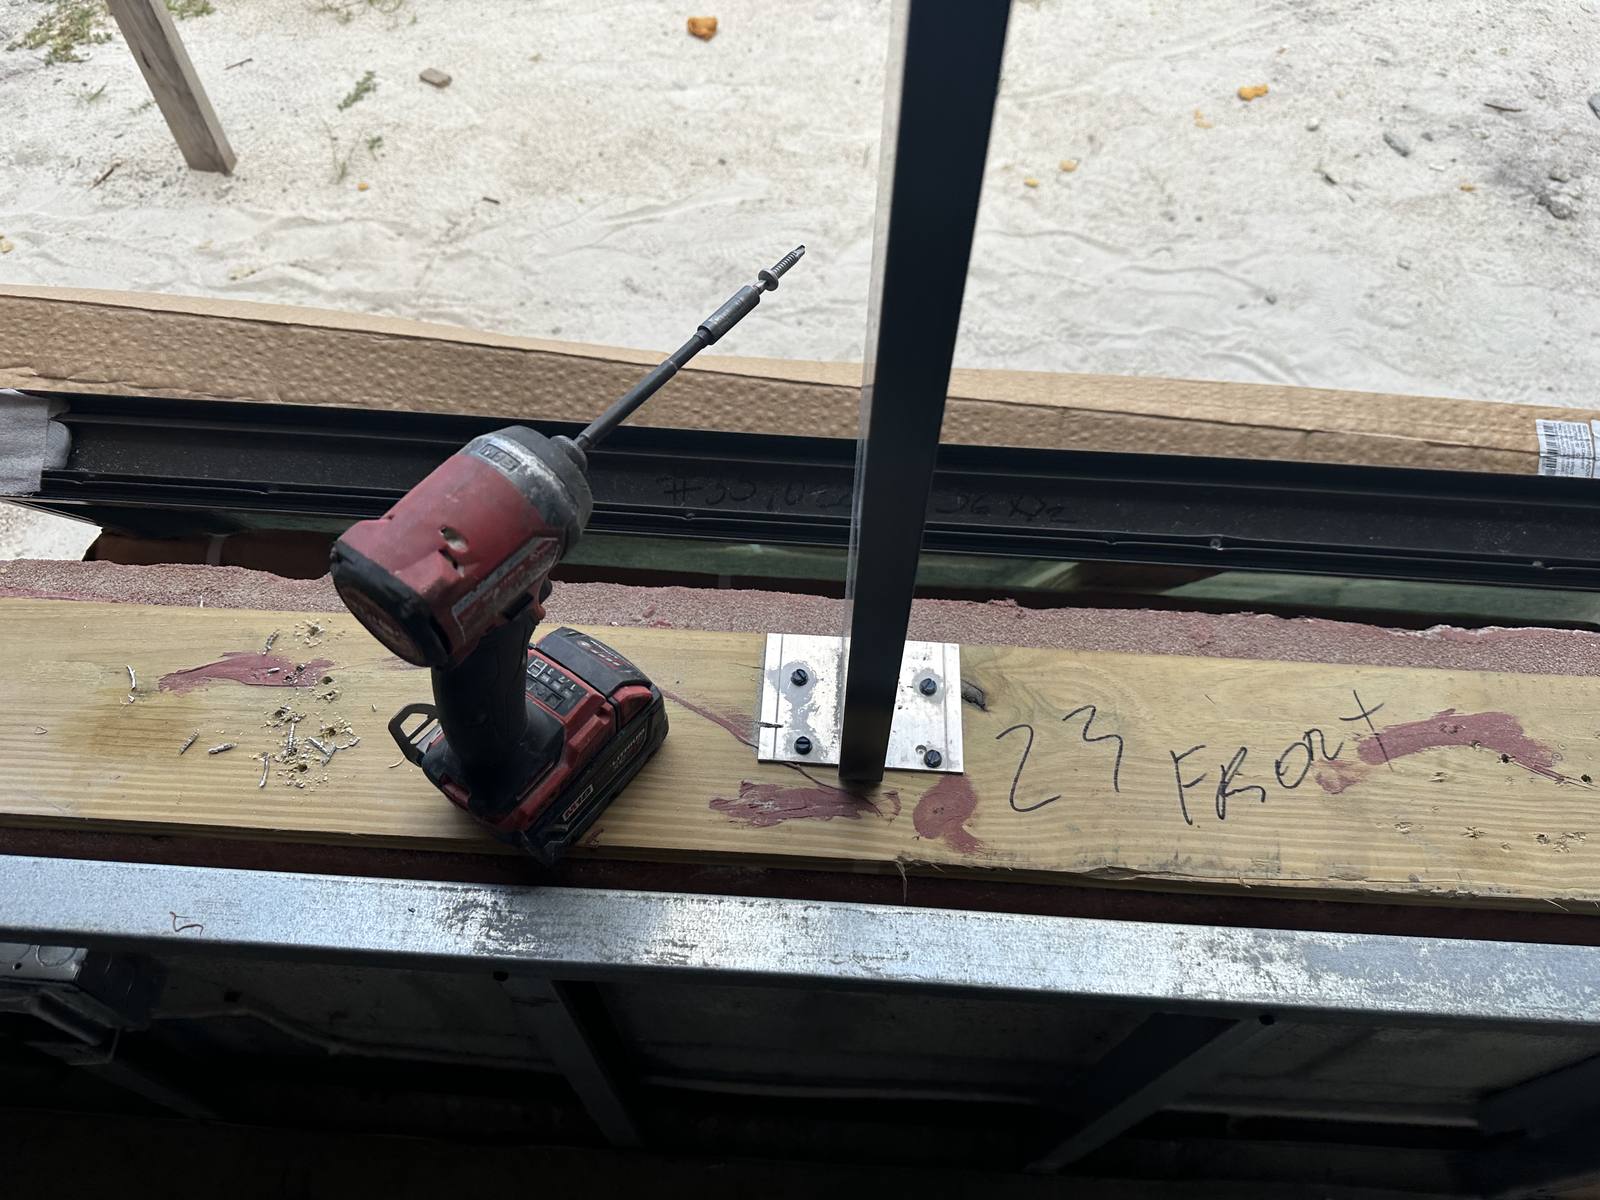
Step 6 · Mullion clipped to the sill buck 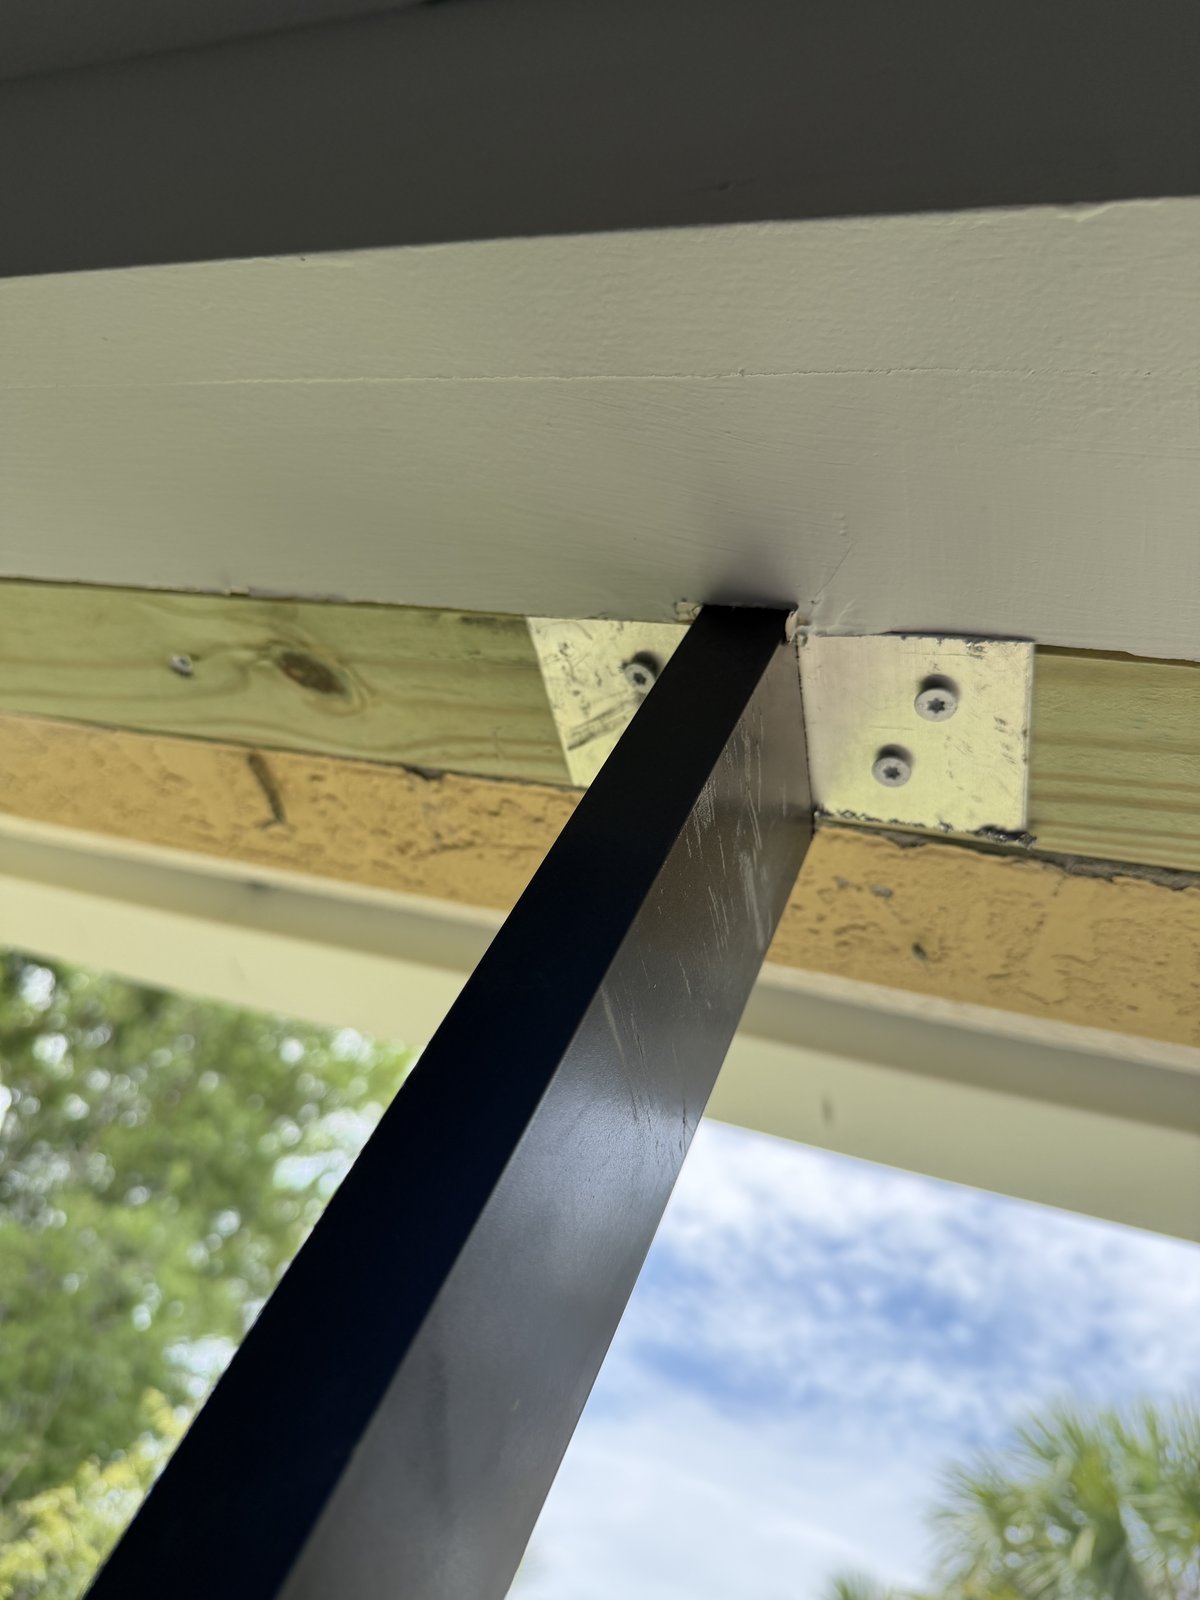
Step 6 · Mullion anchored at the header 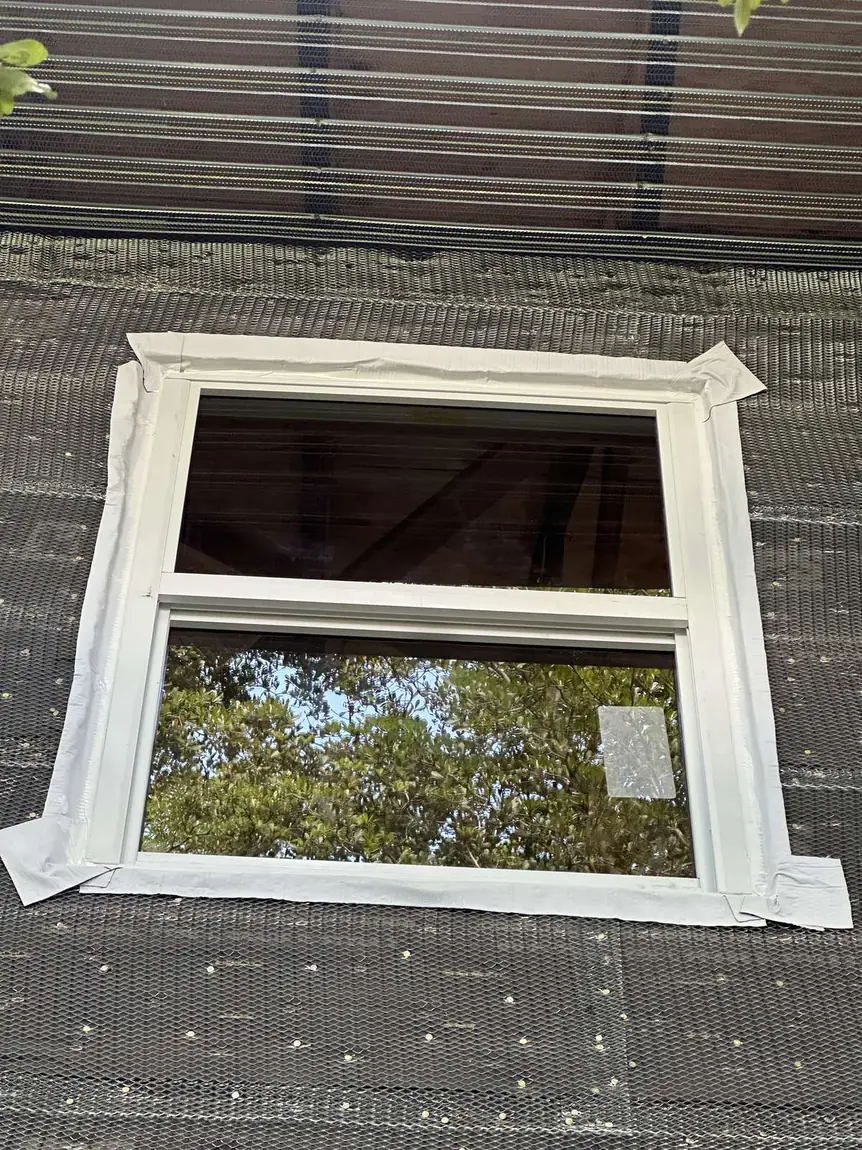
Step 7 · Flashing tape around a newly set window 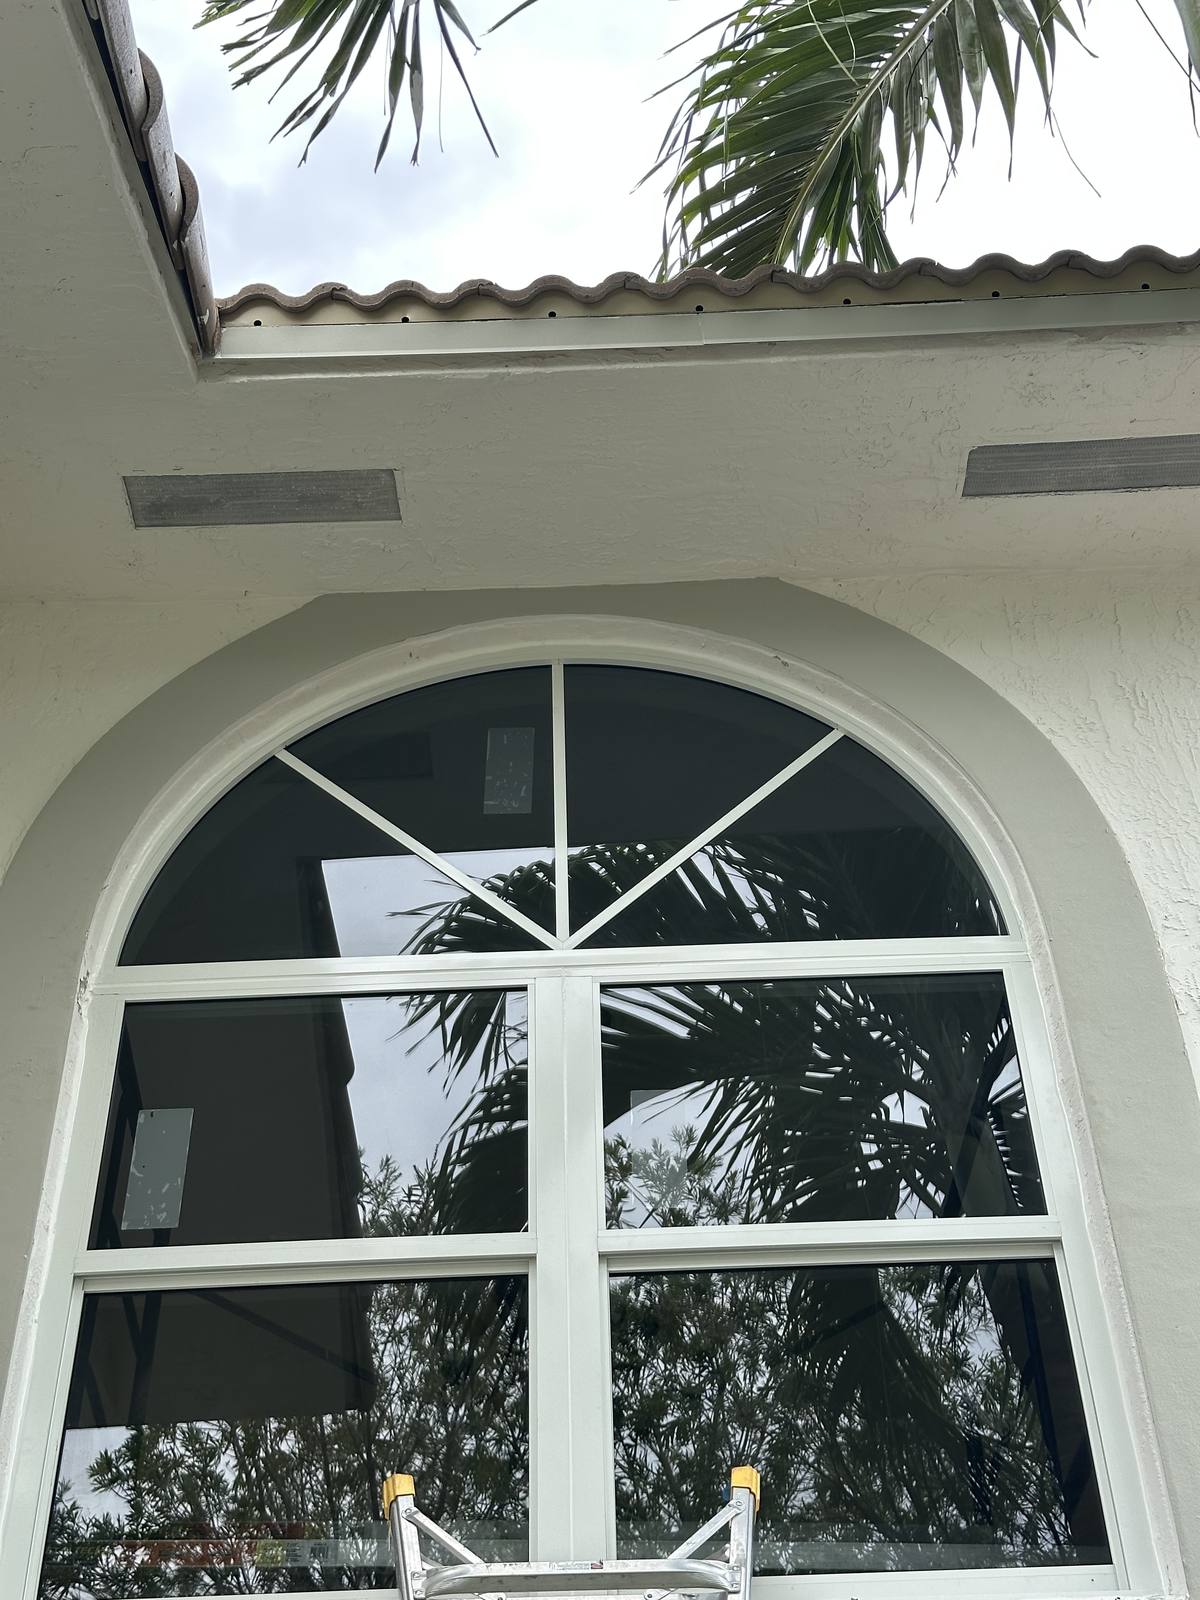
Installed · Arched window assembly in place 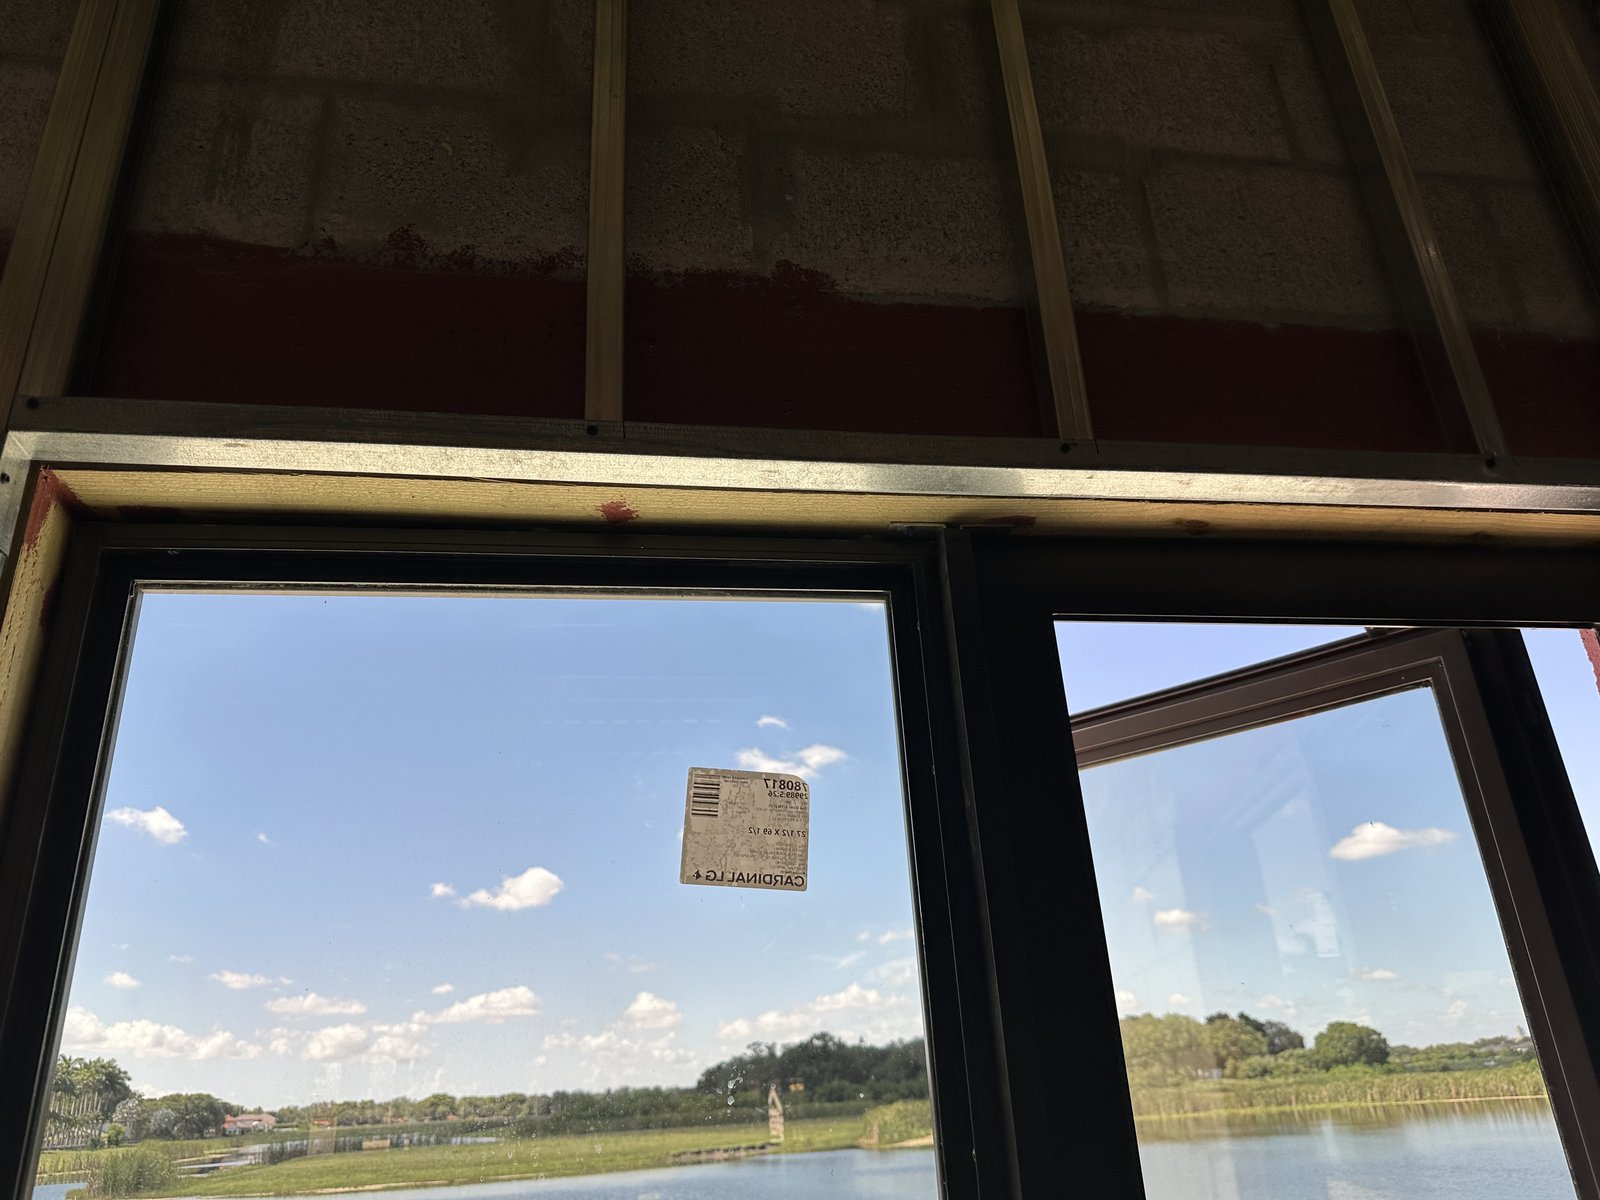
Installed · Mulled windows set, labels still on the glass
Real photos from South Florida window and door jobs. They show completed or in-progress work — not a specific listing or product for sale.
Impact Window Installation on Video
The same work in motion: openings ready on the jobsite, the delivery arriving, new windows and doors going in, and a finished building.
Block-wall openings ready, then the window delivery arrives New construction: tall glass doors and windows going in Finished project: a full building with new impact windows and doors
Real videos from South Florida window and door jobs. They show completed or in-progress work, not a specific listing or product for sale.
Full Timeline: 6–12 Weeks From Contract to Permit Close
| Phase | Duration | What Happens |
|---|---|---|
| 1. Consultation & Measurement | 1–2 days | On-site visit, precise measurements, product selection, quote |
| 2. Contract & HOA Submission | 1–5 days | Contract signed, 50% deposit, HOA application submitted if needed |
| 3. Permit Application | 3–6 weeks | Contractor submits drawings, NOA pages, NOC to building department |
| 4. Manufacturing | 4–8 weeks (factory order) | Windows manufactured to your exact measurements; in-stock product skips this step |
| 5. Installation | 1–3 days | Old windows out, new windows in, anchored, sealed, cleaned |
| 6. Final Inspection | 1–2 weeks after install | Building department inspector signs off and the permit is closed (finaled) |
💡 How Windows Stock Market Saves Time
When you use in-stock inventory from Windows Stock Market, the manufacturing phase (typically 4–8 weeks) is eliminated or dramatically shortened. In-stock products can often be on-site within days of permit approval, cutting the total timeline to 4–6 weeks instead of 8–12.
Phase 1: Consultation & Measurement
A Vieser Construction project manager visits your home for 1–2 hours. What happens during this visit:
- Opening assessment: Every window opening is evaluated — frame condition, rough opening size, structural integrity of the surrounding wall, existing buck frame condition.
- Precise measurements: Each opening is measured at three points (top, middle, bottom / left, center, right) to account for any non-square conditions in older Florida homes. A single measurement is not sufficient.
- Product selection: Frame color, glass type (standard laminate vs Low-E ENERGY STAR), style (single hung, casement, sliding, fixed), and frame material (aluminum vs vinyl) are all selected at this stage.
- Written quote: Line-item quote showing each opening, product SKU, and installed price. Total includes tax and permit fees.
⚠️ Measurement Warning
Never let a contractor take a single measurement per opening and quote a flat price. In South Florida concrete block construction, window openings often vary by 1/4" to 1/2" across the opening. Custom-manufactured windows that are 1/4" off will need to be remade. In-stock inventory from Windows Stock Market is available in standard sizes; your contractor will cut and shim to fit if minor adjustments are needed.
Phase 2: Permitting
After the contract is signed and deposit paid, your contractor submits for the building permit. What's included in the submission:
- Contractor's CGC/CBC license copy and insurance certificates
- Signed and sealed structural plans (engineer of record)
- Notice of Commencement — recorded with county Clerk before submission
- NOA pages for each window and door model being installed
- Existing floor plan with window schedule (each opening with dimensions and product)
| Jurisdiction | Typical Review Time | Expedite Available |
|---|---|---|
| Broward — incorporated cities (Fort Lauderdale, Hollywood, etc.) | 21–25 business days | Yes — typically +50% fee |
| Broward — unincorporated | 30–50 business days | Yes — available |
| Miami-Dade County | 5–10 days plan review; 4–6 weeks total | Yes — BORA expedite |
| Palm Beach County | 14–35 business days (city vs county) | Varies by city |
During permitting, manufacturing typically runs in parallel. Your permit and your product arrive at roughly the same time — good contractors sequence this intentionally.
Phase 3: Installation Day — What to Expect
For an average 3-bedroom Florida home with 12–18 windows, installation takes 1–2 full days. Here's the sequence:
Crew arrives, foreman walks through the project with you. You confirm all openings on the schedule and any special instructions.
Protective drop cloths placed on floors. Furniture cleared back from windows if not already done. Tools and materials staged. Permit placard posted at job site.
Old windows removed one or a few at a time. Old frames, trim, and buck materials set aside. Opening inspected for rot, damage, or structural issues before proceeding.
If existing buck frames are damaged or incorrect size, new pressure-treated lumber is installed. This adds 30–60 minutes per opening but is critical for proper installation.
New impact window set in opening, shimmed level and plumb, anchor pattern drilled and fastened per NOA spec. Takes 30–90 minutes per window depending on size and difficulty.
Perimeter caulked inside and outside per NOA installation instructions. Backer rod installed if required. Stucco patch applied around exterior frame if needed.
All old windows, frames, glass, and debris removed from property. Drop cloths removed. All new windows cleaned, hardware function tested, locks demonstrated.
Foreman walks every window with you. Demonstrates operation, locking, and hardware. You sign completion form.
See It on a Real Job: Removing the Old Window
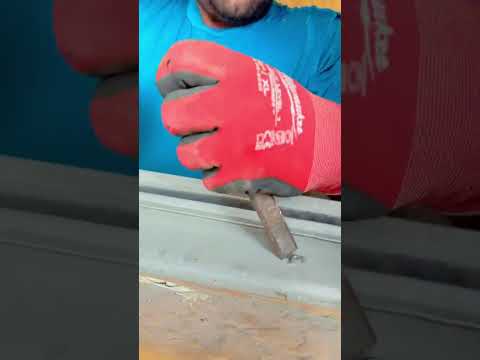
The removal step on a real job: the old window comes out, the opening is cleaned and the interior is sealed off from dust before the new impact window is set.
Homeowner Preparation Checklist
Do these before installation day to avoid delays and protect your belongings:
1 Week Before Installation
- ✅ Notify HOA that installation will begin (if applicable)
- ✅ Call alarm system monitoring company to notify them windows will be open
- ✅ Confirm installation schedule date with contractor
- ✅ Arrange for pets to be secured away from work areas
Day Before Installation
- ✅ Remove all window treatments (blinds, curtains, shades) from every window being replaced
- ✅ Move furniture 3–4 feet back from each window being replaced
- ✅ Remove artwork and decorative items from walls adjacent to windows (vibration during installation can knock them off)
- ✅ Remove window screens (if contractor hasn't already)
- ✅ Clear path from driveway to each work area — crew needs to carry windows in
- ✅ For concrete block homes: protect flooring along the installation path from concrete dust
Installation Day
- ✅ Be present at start for the foreman walk-through
- ✅ Provide access to all areas of the home
- ✅ Stay clear of work areas during installation — falling glass or tools are a hazard
- ✅ Do not schedule other contractors on the same day (electricians, painters, etc.)
- ✅ Be available or reachable if questions arise during the day
- ✅ Be present at end of day for the completion walk-through and sign-off
After Installation: Inspection and Final Steps
Installation is not the end — the permit must be closed with a final inspection. Here's what happens next:
1. Contractor schedules final inspection
Your contractor calls the building department to request a final inspection. Scheduling typically takes 1–5 business days. In some jurisdictions, inspections happen within 24–48 hours of request; in others, especially during busy hurricane season, it can take 1–2 weeks.
2. Inspector arrives
The county or city inspector visits the property, reviews the permit, and physically inspects the installation. They check: anchor pattern and fasteners, NOA label on each window, frame seal, and that the installation matches the approved permit drawings.
3. Passed or corrections needed
If the inspector approves, the permit is closed and stamped. If corrections are needed, the contractor addresses them and a re-inspection is scheduled. Most properly installed jobs pass on the first inspection.
4. Certificate of completion
Once the permit is closed, you receive a certificate of completion. Keep this document — you'll need it for insurance credits (wind mitigation inspection), when you sell the home, and for any future permit applications that reference the existing windows.
5. Wind mitigation inspection (optional but recommended)
After permit close, schedule a separate wind mitigation inspection (a licensed inspector visits for 30–60 minutes). This generates the wind mitigation report your insurance company uses to apply the discount. Cost: $75–$150. Do this as soon as possible after permit close — every month you delay costs you the insurance savings.
Timing Considerations: Hurricane Season & Lead Times
| Period | Lead Time | Notes |
|---|---|---|
| January–April (off-season) | Standard (6–10 weeks) | Best time to start — permits and manufacturing at normal pace, installers available |
| May–June (pre-season) | 8–12 weeks | Demand starts rising; start now to be protected before August |
| July–October (peak hurricane season) | 10–16 weeks | Installers booked out; permit queues longer; manufacturing backlogged |
| November–December (post-season) | 6–8 weeks | Good time — demand drops, faster availability, start for next hurricane season protection |
⚠️ The Hurricane Rush Is Real
When a hurricane is forecast within 5 days, permit offices close and material lead times become irrelevant. You cannot get impact windows installed in 48 hours — no legitimate contractor can do this safely or legally. The only protection available at that point is storm panels or shutters. If you're reading this during a hurricane watch, contact us anyway and we'll put you on the schedule for after the storm — and discuss temporary storm panels in the meantime.
Frequently Asked Questions
How long does impact window installation take from start to finish in Florida?
The full impact window process takes 6–12 weeks in South Florida from initial consultation to permit close-out. The timeline breaks down as: measurement and selection (1–2 days), permitting (3–6 weeks), manufacturing (typically 4–8 weeks for a factory order), installation (1–3 days), and final inspection (1–2 weeks after installation). In-stock inventory can shorten the manufacturing phase significantly.
Do I need to be home during impact window installation?
Yes, for at least part of the installation day. Be present at the start for the foreman walk-through and at the end for the completion inspection. You don't need to be home the entire time, but someone must be present to provide access and sign off on completion.
How disruptive is impact window installation?
Installation is moderately disruptive for 1–3 days. Expect noise from power tools, dust from cutting and drilling (especially in concrete block homes), and temporary openings while windows are being swapped. Most homeowners find the disruption manageable — every window is closed and sealed before the crew leaves for the day.
Will my home be open/exposed during impact window installation?
No — professional crews work on one or a few windows at a time. The old window is removed and the new one is immediately set and anchored before moving to the next opening. Your home is never left with multiple open holes at once.
What do I need to do to prepare for impact window installation?
Before installation day: remove all window treatments, clear furniture 3–4 feet from each window, remove artwork from adjacent walls, and inform your alarm monitoring company. For concrete block homes, also protect flooring near work areas from concrete dust.
Ready to Start? We'll Handle Everything
Vieser Construction manages the entire process — measurement, HOA paperwork, permit filing, NOC, scheduling, installation, and inspection coordination.
In-stock PGT, ESW, and Mr. Glass inventory cuts weeks off the timeline. Free estimate — call or use our calculator.